
How to Create Dynamic Outdoor Photography Shots
Capturing engaging outdoor photography starts with first knowing where you are headed and understanding what you might encounter once you get there. Preparing before you go out will help yield better results.
Researching your location, checking the weather, and planning around light can make the difference between a missed shot and a powerful image. Timing matters. The soft light of morning or the golden hues before sunset brings out textures and emotion that midday light often flattens. But even cloudy skies or unexpected conditions can work to your advantage if you are prepared.
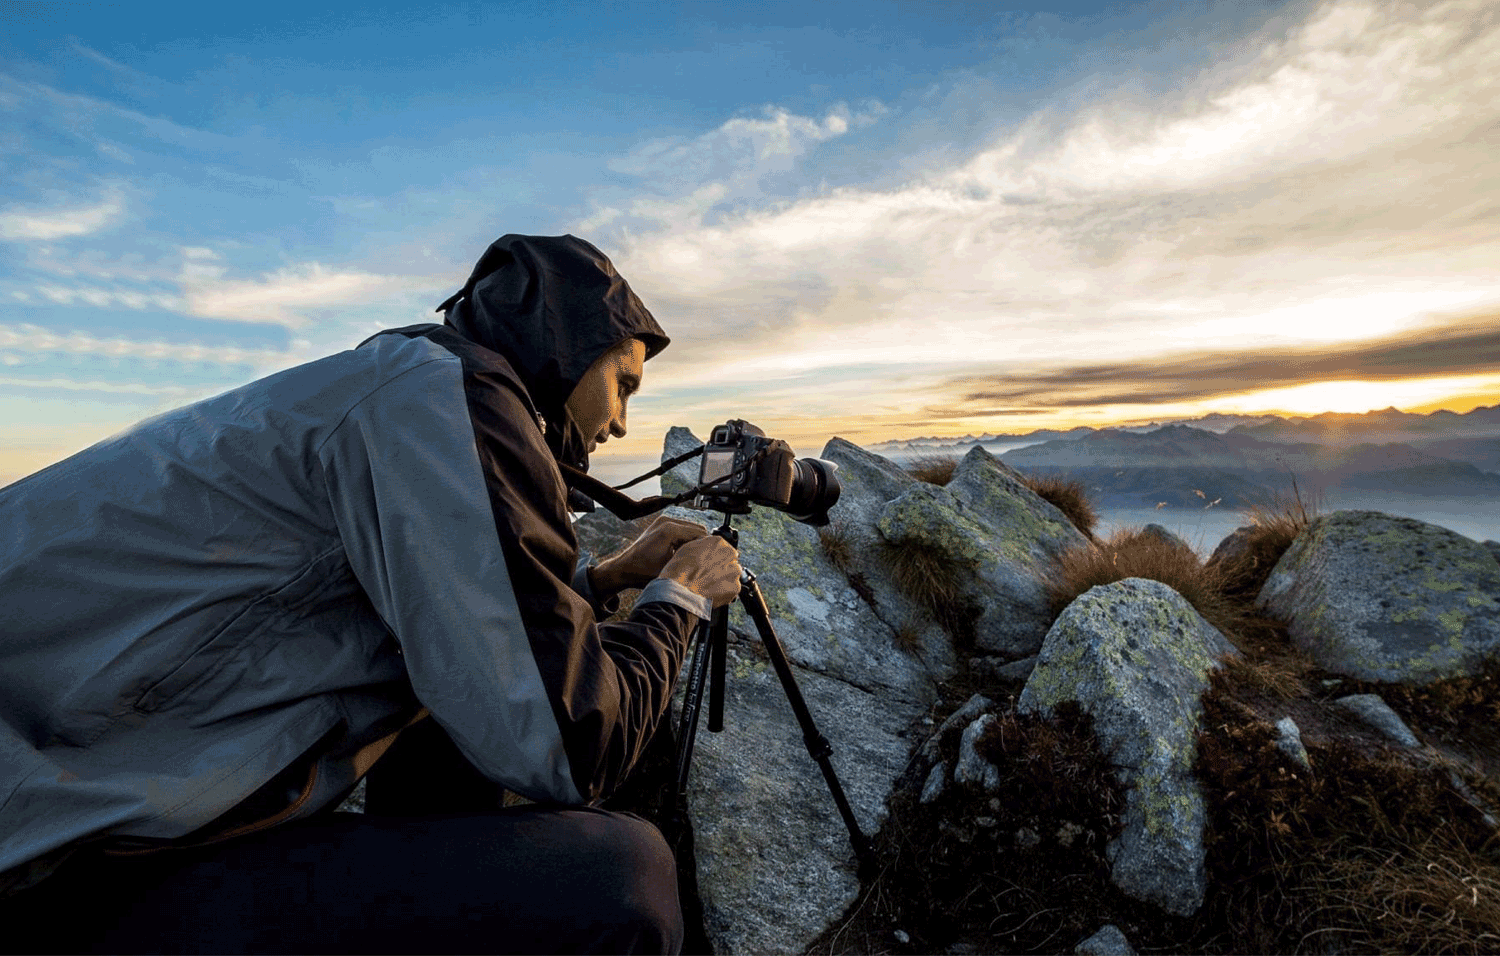
Packing the right gear is just as important as knowing how to use it. A good lens, a sturdy tripod, and extra batteries can help you stay focused on creating, rather than scrambling when something fails.
Dressing for the elements keeps you comfortable and allows you to focus. And if you are headed off the beaten path, make sure you have basics like a map (if your phone dies), a snack, and something to protect your equipment.
Planning your shots can give you direction, but the best moments often show up when you least expect them. Preparation simply allows you to be more open, more aware, and more ready to respond to whatever the landscape offers.
Prepare Before You Go
Identify General Shot Guidelines Then Find Locations
Before heading out, it will help to first define what kind of image you are hoping to create. Are you looking for wide, expansive landscapes that show scale and grandeur? Or are you more drawn to intimate shots that highlight textures, colors, or the way light filters through the trees? Identifying this general goal early gives your planning some direction and helps narrow down the type of environment that will best support your vision.
Once you know what you’re after, you can begin searching for locations. Google Maps, especially in satellite view, is a powerful tool for this. It allows you to scan terrain and look for features like ridge lines, lakes, waterfalls, or open meadows. Pair this with apps like AllTrails or Gaia GPS to find access points and trail descriptions. These apps often include photos from other visitors, elevation profiles, and helpful notes about trail conditions, which can save you time and energy once you are in the field.
It may also help to do a quick search online using phrases that include the location name plus “sunrise,” “fog,” or “winter” to get a feel for how different conditions shape the environment. These preview images can spark ideas.
Go a step further and explore areas just outside the main attraction. A short hike past a popular overlook might lead you to a quieter, lesser-known spot with better angles or more interesting light. Planning this way invites both creativity and flexibility into your process.
Finally, write down or save your key findings. Knowing exactly where to go and when the light will be best frees you to be present once you are out there. The more you prepare, the more time you will spend creating, and less time reacting.

Get a Good Handle on The Weather & Understanding How to Use Natural Light
Checking on and preparing for the weather before going out to photograph the outdoors is one of the most important steps in your quest to get good shots. It is not just about staying safe or knowing what to wear, weather can completely shape the mood, color, and overall impact of your shots.
Start by looking at a few different weather sources the night before and again the morning of your venture. Apps like Weather Underground, Windy, and the National Weather Service will provide cloud cover, wind speed, temperature and light conditions throughout the day.
Pay special attention to sunrise or sunset times and track the direction of light using an app like PhotoPills or The Photographer’s Ephemeris. These tools show you how light will move across your location throughout the day.
Shadows and highlights play powerful role in shaping outdoor photography. They help define depth, texture in a shot. Notice that when sunlight hits a landscape, it does not light all surfaces evenly. Some areas fall into shadow while others catch the brightest parts of the light. That contrast adds dimension and gives the eye a path to follow. Finding the right light can increase your chances of capturing high contrast images.
A tree casting a long shadow across a field can lead the viewer through the frame. A beam of sunlight breaking through clouds can draw attention to one specific spot. Shadows can also dictate the mood of an image. They add mystery, softness, or drama, depending on how they fall and what surrounds them.
Highlights, on the other hand, bring energy and focus. They lift a scene and can make it feel alive. When you learn to watch how light moves and how shadows stretch or shrink throughout the day, you start to identify opportunities.
A clear sky at sunset will create warm, glowing light that brings out soft shadows and rich tones. On a cloudy day, you get even lighting with softer contrast, which works well for portraits or capturing texture.
Rain or fog can add drama and atmosphere, especially in forests or open landscapes. Wind, on the other hand, can be tricky. Wind moves foliage and water, so you may need to adjust your shutter speed or tripod stability if you plan to shoot on a windy day.
Sometimes, unpredictable weather brings the most memorable images. A break in the clouds or a sudden shift in light can turn an ordinary scene into something breathtaking. But you will only be ready to capture it if you prepare ahead. Treat the forecast as part of your creative toolkit.
Once you know where you are headed, check the weather daily and hourly. Pay attention to temperature, wind, and especially cloud cover.

Packing The Right Camera Gear
Packing the right gear is a critical step when planning a trip to get a great outdoor photography shot. When you are prepared, you’ll be able to focus on the creative aspects of the journey rather than stressing out over having the right equipment. When you have what you need, you’ll move more confidently through the landscape and respond more easily to what unfolds in front of you.
Start with the heart of your setup; your camera and lenses. Whether you are using a DSLR, mirrorless camera, or even a phone with a solid camera system, make sure it is something you know how to use and can rely on.
If you plan to shoot wide open spaces like mountains, beaches, or sweeping landscapes, a wide-angle lens will help you capture the full scope of the scene. For more distant subjects like wildlife or layered hills, a telephoto lens lets you reach in without getting too close. A prime lens, known for its sharpness and simplicity, is perfect for focusing on detail or getting clean, natural portraits within the landscape.
A tripod is another valuable piece of gear, especially if you plan to shoot in low light, try long exposures, or want to carefully compose a scene. A stable tripod can keep your images crisp when your hands cannot. It also gives you space to pause, adjust, and take your time without rushing the shot.
Do not forget extra batteries and memory cards. Cold weather drains batteries faster than you expect, and long shoots can quickly fill up a memory card, especially if you are shooting in RAW format for better editing options. Always bring more than you think you will need.
Keeping your lens clean is just as important as what you point it at. Dust, moisture, and fingerprints are part of outdoor life, so pack a lens cloth and a basic cleaning kit. These small items can save your favorite photo from being ruined by a smudge or a water spot.
Weather can change quickly, even on the sunniest of days. A rain cover or a dry bag is worth slipping into your pack just in case. A microfiber towel or a soft cloth can help you dry gear or clean up moisture if the conditions shift. It is not just about protecting your equipment, it is also about giving yourself peace of mind so you can keep shooting without worry.
Carrying all of your photography gear comfortably should be a consideration. Choose a camera backpack or sling bag that fits snugly and feels balanced while you walk. It should have enough padding to protect your equipment, enough space to keep things organized, and enough structure so you are not fumbling when you want to grab your camera quickly. If possible, choose something that resists light rain or has a built-in rain flap.
Filters can be optional, but they can also elevate your outdoor photography. A polarizing filter helps cut through glare on water or leaves, deepens the color of the sky, and makes scenes feel more vibrant.
Neutral density filters let you take longer exposures in bright daylight, so you can create soft, flowing images of waterfalls or moving clouds without overexposing the frame.
Finally, your smartphone will be a handy tool. The phone will not just be a backup camera, but also a planning tool. Apps like PhotoPills or The Photographer’s Ephemeris help you track light, plan sunrise and sunset shots, and understand how shadows will fall throughout the day. Your phone can also help you review weather updates, or take quick notes on scenes you want to revisit.
When you pack carefully, you’ll be equipped with the tools to focus on the creative process and you’ll help avoid dragging around extra weight or stressing out over missing gear.
Personal Gear
When going out for that ultimate outdoor photograph, it is not just about the camera. It is also about taking care of yourself so you can stay focused and comfortable while you work. Start by addressing your clothing. Dress in layers so you can adjust as the temperature changes throughout the day. Weather can shift quickly, especially in the mountains or near water. A lightweight waterproof jacket is always a smart idea, even if the forecast looks clear.
Comfortable, durable shoes are a must. You will likely be walking over uneven ground, through wet grass, or maybe even up rocky trails.
Bring enough water to stay hydrated and pack a snack or two to keep your energy up. A granola bar or some fruit can make a big difference when you are out longer than planned.
A hat and sunscreen are also important. If you are shooting early or late in the day, consider packing a headlamp or flashlight. It helps you move safely in the dark and can even be used for creative lighting if needed.
A small first aid kit is smart to have on hand. You do not need a full setup, but a few bandages, pain relievers, and antiseptic wipes can go a long way if you get a scrape or blister. It is also wise to bring a printed map or a downloaded version on your phone, especially if you are going off the main path. Phone signals can be unreliable in remote areas.
Lastly, think about comfort and focus. If you plan to stay in one place for a while, a lightweight foldable stool or foam pad can help. Bug spray might also come in handy depending on the season and location.

Identifying a Strong Subject
Choose a Clear Focal Point to Anchor Your Image
Choosing a clear focal point when creating a strong outdoor photograph gives your image direction and helps guide the viewer’s eye. Without a focal point, a photo can feel flat or confusing, even if the scene itself is beautiful.
Start by asking yourself what drew you to the scene in the first place. Maybe it was the way light hit the side of a mountain, the shape of a single tree standing in a field, or the way a person moved through the landscape. This will be your starting point. That is what you want people to notice first when they look at your image.
Once you have established a focal point, position yourself in a way that makes that subject stand out. Move around. Look at it from different angles. Sometimes a shift to the left or a step lower to the ground can make all the difference.
Use natural lines or shapes in the landscape to guide attention. A winding path, a row of trees, or the curve of a shoreline can all point the viewer toward your subject without you having to say a word.
Pay attention to distractions in the background. If there is too much going on behind your focal point, it can compete for attention. Try to frame your subject with cleaner space or use a shallow depth of field to create a gentle blur around it. Light can also help. If your subject is brighter than the surrounding area or catching the last bit of sun, it will naturally become the central focus.
Do not worry about getting it perfect. Choosing a focal point is less about rules and more about intention. You’re simply making a decision about what matters most in the frame. When you commit to that, your photo becomes more than just a pretty view. It has intention.
Let Your Subject Guide How You Compose the Photo
Instead of rushing to center your subject or defaulting to a typical wide shot, ask yourself what makes this subject interesting at that given moment. Is it the way the light hits it? The color or texture? The direction it faces? Maybe it is interacting with its surroundings in a subtle but intriguing way. Let those qualities influence where you stand, what you include in the frame, and how you arrange the elements around it.
If your subject is tall, like a tree or a mountain, try framing it vertically to give it room to breathe. If it is wide, like a horizon or a line of cliffs, a horizontal composition may feel more natural. If there is movement involved, like a person walking, an animal grazing, or water flowing, leave space in the direction they are moving. This gives your photo a sense of momentum and balance.
Use the environment to your advantage. A bend in a river or a break in the clouds might point right to your subject, helping the viewer's eye land exactly where you want it to.
Pay attention to where your subject looks or leads the eye. Do not be afraid to leave space around it. On the other hand, getting closer can make your subject feel more intimate. Each choice changes the energy of the image.
When you let your subject take the lead, your photo begins to feel more natural and emotionally grounded. It becomes less about technical perfection and more about connection. That is what people remember when they look at a photograph, how it made them feel, not how it was measured.
Incorporating Composition Techniques

Follow the Rule of Thirds, but Don’t be Afraid to Break it
The rule of thirds suggests that you divide your frame into a grid with two vertical and two horizontal lines, creating nine equal sections. The idea is to place your subject along these lines or where the lines intersect. Doing this often creates a more balanced and visually interesting image.
As useful as the rule of thirds is, it should never box you in. There are moments when breaking that rule is exactly what the photo needs.
Some scenes call for symmetry, where placing your subject dead center creates a sense of calm or formality. Think of a lone tree reflected perfectly in still water, or a trail that runs straight down the middle of your frame into the distance. Other times, the emotion or energy of the moment is stronger when you throw balance out the window and go with something unexpected. That might mean tilting your frame slightly, getting extremely close to your subject, or placing it in the far corner of your composition.
The key is to learn the rule so you understand what it does well, then trust yourself to move beyond it when the scene asks for something different.
Your eye and your gut often know more than the grid does. If you feel drawn to frame a shot a certain way, try it. Experiment. Take both versions if you are unsure. Sometimes the rule of thirds will make your image stronger. Sometimes breaking it will create something unique. Let the scene, the light, and your creative instinct be the final voice. That is how you move from following rules to finding your own style.
Include Foreground Elements for Depth
Including foreground elements in your outdoor photography is one of the simplest and most powerful ways to create a sense of depth in your image. It helps turn a flat scene into something that feels layered and three dimensional.
When all of the primary elements of the photo are off in the distance, it can sometimes result in a feeling of being disconnected to the subject. But when you place elements in the foreground such as a rock, a patch of flowers, a trail, even a puddle, it gives the viewer a starting point. It draws the eye in and creates a path through the frame toward the background. That movement makes the photo more engaging and helps it tell a richer story.
To do this well, you often need to slow down and look at your surroundings differently. Instead of focusing only on what is far off, take a few moments to look right in front of you. Kneel down. Change your angle. Walk a few steps to the side. You might notice tree roots creating a natural pattern, or a piece of driftwood resting in just the right place. These elements do not need to be big or dramatic. They just need to connect visually with the rest of the scene.
Depth also adds emotion. A close foreground subject can feel more personal or tactile. It makes the viewer feel like they are standing right where you were. The middle and background then become part of a bigger picture, offering context, scale, or a sense of discovery.
When you learn to work with the layers in a scene you begin to see how different elements relate to each other. That is what gives an image life.
Use Leading Lines to Draw the Eye into the Scene
Using leading lines in outdoor photography is a powerful way to guide the viewer’s eye and create a deeper connection to the image.
Leading lines are natural or manmade elements in a scene that draw the eye toward a specific point, often leading to the main subject or deeper into the landscape. They help create a sense of direction and movement, which makes the photo feel more alive. A winding trail, a river cutting through a valley, a row of trees, or even a beam of light can all act as leading lines.
What makes leading lines so important is their ability to add structure without making the photo feel forced. Instead of the viewer’s gaze bouncing around aimlessly, their eye flows through the scene in a way that feels intentional and satisfying. This not only holds their attention longer but also helps tell a story.
To use leading lines effectively, you need to pay attention to how elements in the scene connect. Sometimes that means getting lower to the ground so a fence or shadow lines up just right. Other times it means shifting your position slightly so a road or shoreline points directly toward your subject. The lines do not have to be straight or obvious.
Subtle shapes and curves can be just as powerful. What matters most is how they guide the eye and support the overall mood of the photo. When you learn to see and use these visual pathways, your images become more focused, more dynamic, and more emotionally engaging.
Play With Perspective

Try Low or High Angles to Create Visual Interest
Most people view the world from eye level, so photos taken from that same height can start to feel predictable. When you change your angle, either by getting low to the ground or by finding a higher viewpoint, you immediately provide a different look.
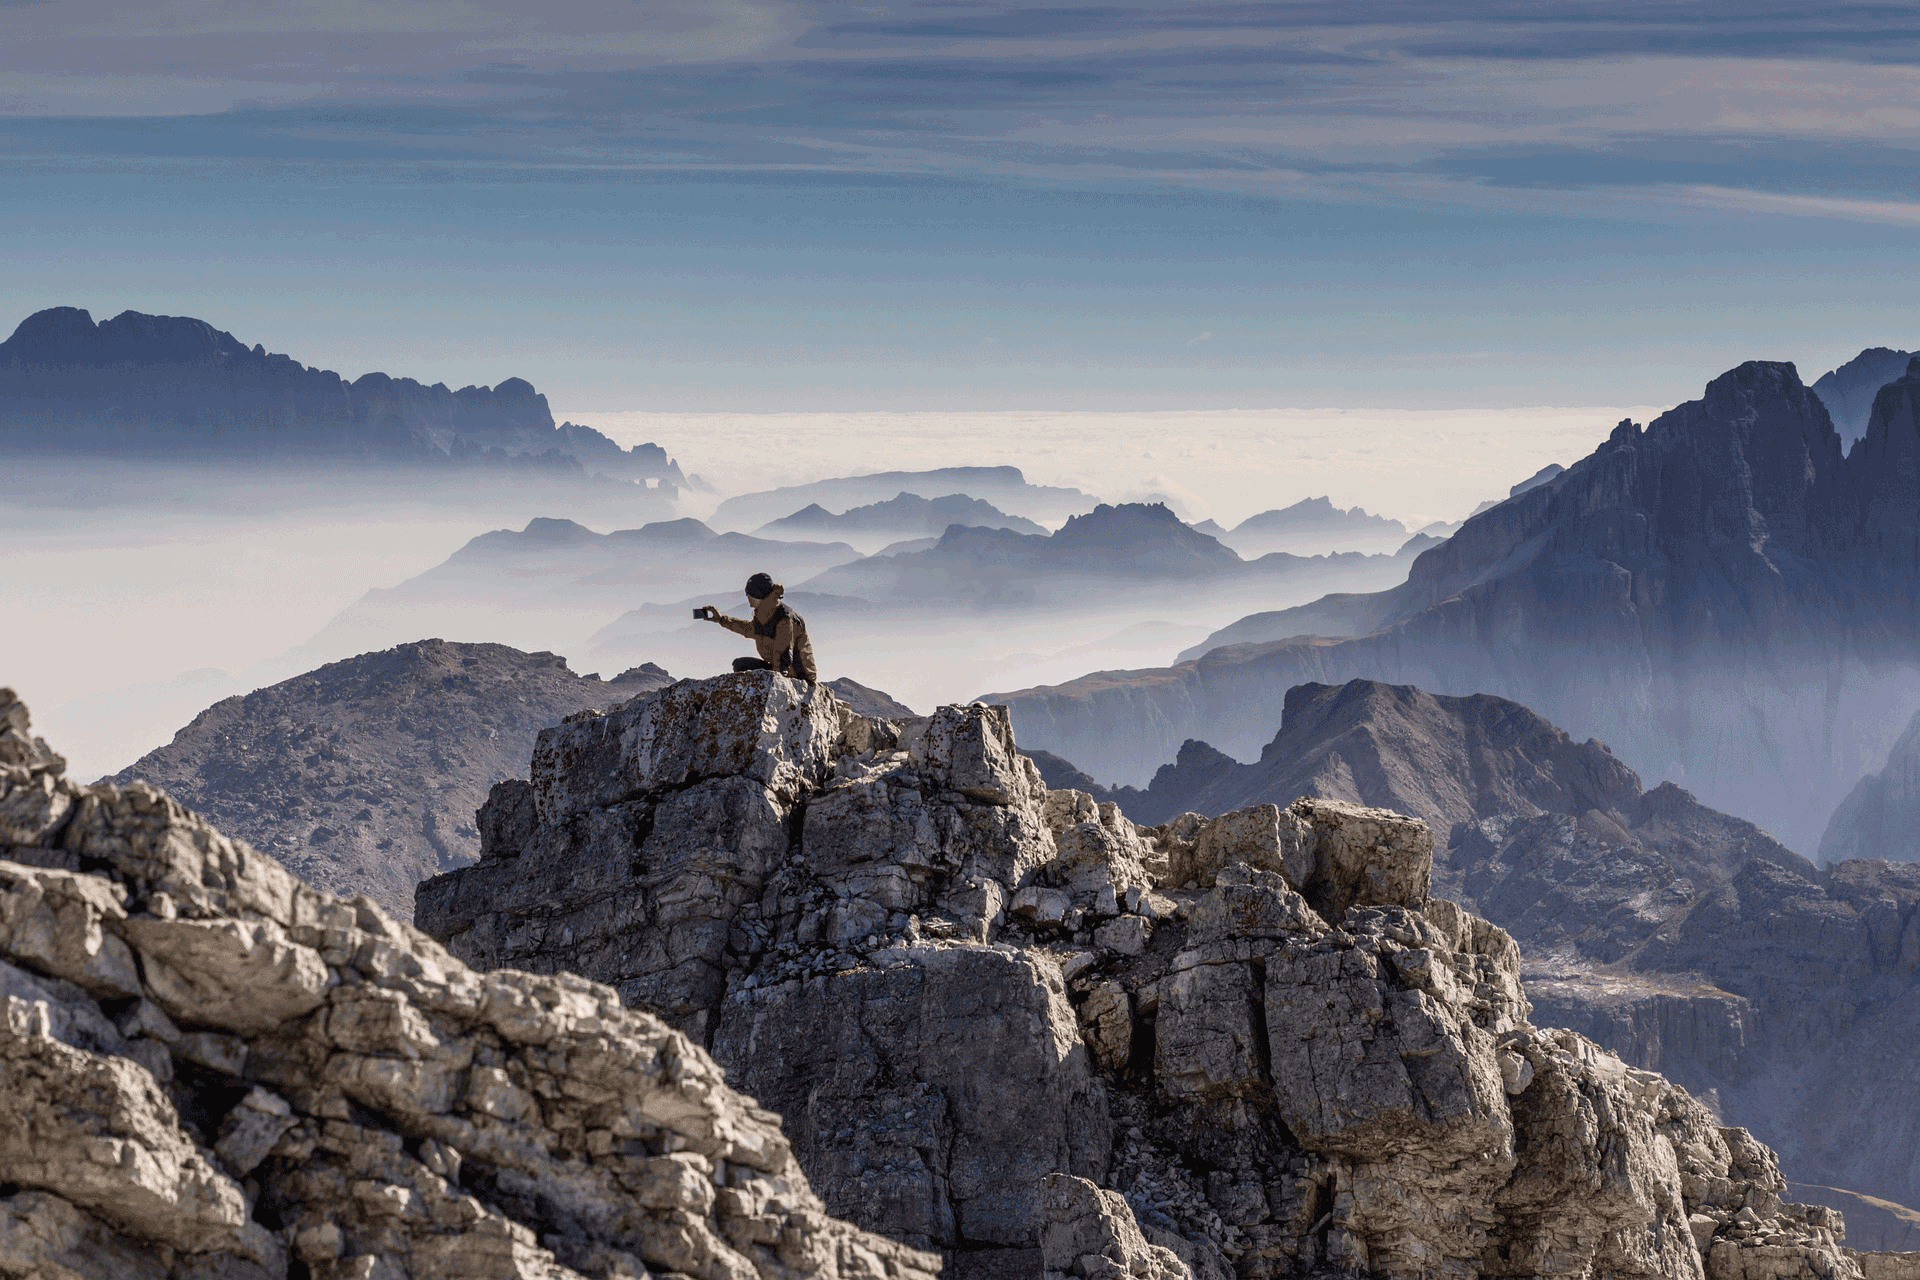
Getting low to the ground allows you to include unique foreground elements that might otherwise go unnoticed. You might catch the texture of moss, the shape of a rock, or the way flowers lead into the background. This angle also adds depth and creates a sense of scale, especially when you are shooting wide landscapes. Shooting from a low perspective can make mountains look even more grand or emphasize how small a person feels in a wide-open space.
On the other hand, climbing a small hill or standing on a rock to look down on your subject can give a clearer sense of layout and connection between elements in the frame. It can flatten shapes in a way that feels graphic or abstract. Looking down on a winding trail, a flowing river, or even a camp setup gives the viewer a chance to see the scene from a more distant or thoughtful perspective.
Move Around Your Subject to Find the Most Compelling Frame
As mentioned, changing your position, even slightly, can completely transform the feeling of a photograph. If you take the time to walk around, shift to one side, or step back a few feet, you begin to see the subject in new ways. The light might hit it differently. The background might clean up or become more interesting. The lines and shapes might fall into place just right.
This movement helps you discover what the scene is really offering. Maybe from one angle, a lone tree looks ordinary, but from another, its branches line up perfectly with a mountain in the distance.
Maybe the light from one side creates harsh contrast, while from the other side it brings out gentle detail and warmth. Even how the elements in the background interact with your subject can make or break a shot. You want to avoid distractions like power lines or cluttered trees that pull attention away from what matters.
Each step you take is a chance to see your subject from a fresh point of view. It is not just about finding the most beautiful frame. It is about finding the one that tells the story best. The one that feels most honest to what you are seeing and feeling in that moment. When you move with intention and curiosity, your images reflect that sense of care.
Capture Real Moments
Embrace Movement and Spontaneity
Nature does not wait for you to set up the perfect shot. Light shifts. Clouds roll in. Birds take flight. Wind ripples through grass. These fleeting moments are often the ones that hold the most emotion and energy.
If you try too hard to control everything, you might miss what is actually happening in front of you. Letting go of the need for perfection allows you to stay open to the unexpected. It teaches you to react with your camera rather than overthink the scene.
Movement brings life into your images. Whether it is a person walking along a trail, a wave crashing on rocks, or trees swaying in the breeze, these elements remind the viewer that the landscape is alive. They give your photos a sense of time passing and place evolving.
Spontaneity is also where creativity lives. Some of the best shots happen when you respond to something you did not expect such as a sudden break in the clouds, a shaft of light hitting a hill, or an animal crossing your path.
You cannot plan for these things, but you can prepare yourself to notice them. That means staying present, moving slowly, and paying attention not just with your eyes but with your full awareness.
When you photograph with flexibility and openness, you give yourself permission to make mistakes, to be surprised, and to discover what the landscape wants to offer you. And that often leads to images that feel real and unforced.
Creating a Simple Composition
Remove Distractions from the Background if Possible
Removing distracting elements from the background of an outdoor shot allows your subject to truly shine and can help tell a clearer story. This step is typically viable for subjects that are being featured in the foreground and do not, obviously, apply to shots such as landscapes and subjects that are far off in the distance.
Imagine your subject framed against a jumble of clutter or bright colors. These types of visual distractions pull the eye away from the subject, and the impact of the image weakens.
When distractions are minimized, the viewer’s gaze naturally falls on the intended primary visual element. It creates a sense of calm and focus in the photograph, making it easier to connect to the composition.
Sometimes distractions are obvious, like a trash can or a person walking by, but other times they are subtle. They can include items like an awkwardly shaped branch, a patch of bright light, or clutter in the background.
Taking a moment to scan the scene, adjust your angle, or even gently remove or reposition elements, can transform an average shot into something memorable. This style is about crafting a visual story that feels intentional and thoughtful.
Frame Your Outdoor Photography Shots Using Natural Elements
Framing shots using elements like branches, rock formations, or doorways can completely change the way your image feels.
These natural or structural shapes draw the viewer’s attention into the scene and toward your subject. Capturing that perfect outdoor image is not just about decoration, it is about storytelling.
A mountain framed by a cave entrance feels more adventurous. A person seen through the opening of tree limbs feels more intimate. These frames help organize the image and guide the eye, making it easier for someone to know what to look at and why it matters. They also add depth and layers, which can make your photo feel more alive and immersive.
Tell a Story With Your Photography
Think Beyond Single Images and Consider How Your Photos Can Connect
When shooting outdoors, it helps to think beyond just one photo and consider how your images can work together. A single shot can be powerful, but a series of connected photos can tell a fuller story.
For example, one image may show a wide landscape while another focuses on a detail of the same subject such as a leaf or a texture. A third piece in the series could capture an animal or person moving through the space. Together, they give a sense of time, place, and visual interest that cannot be captured with a single image.
This approach makes your work feel more thoughtful and complete. It encourages you to look at the scene from different angles and distances. You start to think like a storyteller, not just a person with a camera. It becomes an experience, not just a snapshot.
Use Scale and Contrast to Give Your Image Context
Using scale and contrast in outdoor photography helps give your image context and makes it easier for the viewer to understand what they are looking at.
Including something familiar in the frame, such as a person or a tree, can show how big or small the landscape really is. Contrast works in a similar way. It can be visual, like dark rocks against a bright sky, or conceptual, like a quiet figure in a wild, stormy setting.
These differences create tension or balance. Without scale or contrast, a photo can feel flat. But when you use them well, your image becomes more than just a nice view.
Edit With a Light Hand

Enhance The Appealing Elements of An Image Without Overprocessing
Avoiding over processing is about knowing when to stop. It starts with getting the best shot possible. If you’ve achieved an image with good light, clear focus, and a strong composition, editing should feel more like refining than fixing.
Simple processing techniques may include lifting the shadows a bit, bringing out the color in the sky, or sharpening the details just enough to make them pop. But if the image starts to look too perfect or too unnatural, you lose the elements that made it special in the first place. The goal is to support what is already in place, not to change the mood or rewrite the story.
When you keep the adjustments subtle and thoughtful, the photo maintains its honesty. It feels real.
Adjust Color and Contrast to Create a Specific Mood
Adjusting the color and contrast when shooting outdoor photography can have a significant impact on shaping the mood of your outdoor shot.
Think of it like tuning an instrument. If you’re seeking a calm and peaceful vibe, soften the contrast and shift your tones toward cooler colors like blue and green.
For something more dramatic or intense, deepen the shadows and let warmer tones like orange or red take the lead.
Pay attention to how light affects the scene in real time. A hazy morning might already lean soft and quiet, so you can enhance that with gentle contrast and subtle color grading. A bright sunlit scene might need you to pull back the highlights or warm up the tones to keep it feeling real and rich.
Always ask yourself what emotion you want the photo to carry. Then use color and contrast to better establish that feeling
Keep it Consistent if You’re Creating a Set of Photos
Start by picking one image from the set that really captures the mood or light you are after. Use it as your guide. Adjust the tones, color balance, and contrast on that photo until it feels right. Then apply those same settings to the rest of your images.
From there, you can make small tweaks if something looks off, but always circle back to that first image. It helps to edit in the same session so your eye stays in tune with the look you are building. Trust your instincts. If something starts to feel too different, pause and ask yourself what changed. Editing is not just about style. It is about creating a thread that connects the whole set.
Always Be Learning
Let Your Style Evolve by Trying New Approaches
Give yourself permission to try something different. Step outside your usual way of shooting. Change your angle. Use a lens you rarely touch. Wait for unusual light. Some of it might not work, but every experiment teaches you something. You begin to see things in new ways.
Maybe you discover that you love deep shadows or that soft light at dusk brings out something honest in your work. Growth does not happen when you play it safe. It happens when you take chances and chase curiosity. Let your style be a living thing. Let it shift. Let it surprise you. That is how you keep it yours.
Learn from Mistakes and Missed Shots
Every missed shot is a lesson waiting to happen. You see the image in your head, but it just doesn’t land. Maybe the light changed. Maybe the focus slipped. Maybe you rushed. Take a breath and look at what went wrong without beating yourself up.
Those mistakes are part of the work. They teach you how to slow down. How to read a scene better. How to trust your gut. Over time, you start to notice the small things before they trip you up. You grow more patient. More aware. Missed shots are not failures. They are steps forward. Let them guide and shape your approach for the next time out. That is how you get better.
The More Practice You Have, the Better Your Eye Becomes
The more times you get out there and explore, the more your eye begins to notice. Little things start to stand out. When you keep showing up in new places, your sense of composition grows sharper without even realizing it. You start to see potential everywhere. You take more risks and trust yourself more.
Every walk through the woods or along the coast adds something. Exploration fuels creativity and keeps your perspective fresh. And the more you see, the more you understand what truly moves you. That is when your photography starts to speak in your voice. Good luck and have fun!
